Hummus

One of the many, many things I miss from Cyprus, is their hummus. It’s something incredible, let me tell you. And as much as I love Estonia, they still have a lot to learn when it comes to the art of Hummus.

One summer, I took a dear friend of mine to my beautiful home in Paphos, and one of the first things she tried was hummus. In her words she said that I “ruined hummus for her”, because she knows she won’t be able to find hummus as good as Greek hummus anywhere else. Sorry Laura, haha. After this beautiful introduction we proceeded to have hummus and pita (Cypriot pita is also out of this world) for breakfast, lunch and dinner.

But the day came when summer ended and we needed to leave my beautiful island and all its delicacies. But how could I live a hummus-less life? That’s when my flatmate came to the rescue!

My flatmate is from Israel, which happens shares a lot of similarities to Cyprus in cuisine. And though the kitchen isn’t exactly her favorite room in the house (though she loves food) she actually has an awesome hummus recipe! Can I get a hallelujah!

So, if you’re craving some Mediterranean flavors. You are in the right spot! This recipe has been a taste of home and has held me over until the holidays when I can go home and grab a giant tub of my favorite hummus from AlphaMega or Philipous.

Ugh, ok I’m getting hungry, let’s make some hummus!!

You will need:
  • 1 can chickpeas peas (400g)
  • 1/2 a jar of Tahini (150g)
  • Juice of 1 lemon
  • 1-2 teaspoon cumin
  • 1 teaspoon minced garlic
  • 1/2 teaspoon salt
  • 1/4 c water (60ml)
First drain the aquafaba (the chickpea juice) into a small saucepan. Set aside.
Pour the chickpeas into a deep bowl or container with water.
Ok, now this part is a bit tedious, but it will make a your hummus much smoother and less grainy. Rub the chickpeas roughly in between your hands in order to loosen the skins so that they fall off easily. (But not so roughly that you crush the chickpeas.) Do this a few times, then tip the bowl discarding the water and the skins. (The skins should float to the top making them easy to discard.) Refill the bowl with water and repeat until most of the chickpeas no longer have any skins on them.
Now add your chickpeas to the saucepan with aquafaba and bring to a boil. Then lower to medium heat and cook for an hour. Check every 20 minutes or so to see if they need any extra water; the chickpeas should always be covered with liquid.
Tahini! Oh how I love Tahini. One thing you should make sure of before you use it is that it is well mixed. If it had been sitting for a long time the oil and the paste will separate. So give it a good stir with a butter knife before hand. Tip: if one day you see that the tahini is beginning to separate, simply flip the jar upside down and it will naturally mix itself. Then it will be ready to use whenever you need it.
Now that the chickpeas are done boiling, strain them and run them under cold water in order to cool them down. (We don’t want hot hummus.) Repeat the process of rubbing them in your hands once or twice more to get rid of any leftover, stubborn little skins. Make sure to be gentle this time as the chickpeas will be quite soft now.
Now add everything to a food processor. Start with 1 teaspoon of cumin and a half a lemon, then add more according to your preferences. I normally use 2 teaspoon of cumin and 1 whole lemon though.
Blend away! If it is still very thick, add water, lemon juice (or olive oil is an option too) 1 tablespoon at a time. And your done!
Drizzle with some olive oil and sprinkle on some paprika and chickpeas to serve. Or just eat plain- also amazing.
Mediterranean Hummus

Ingredients:
1 can chickpeas peas (400g)
1/2 a jar of Tahini (150g)
Juice of 1 lemon
1-2 teaspoon cumin
1 teaspoon minced garlic
1/2 teaspoon salt
1/4 c water (60ml)

Instructions:
1.First drain the aquafaba(the chickpea juice) into a small saucepan. Set aside.
2.Pour the chickpeas into a deep bowl or container with water.
3.Rub the chickpeas roughly in between your hands in order to loosen the skins so that they fall off easily. (But not so roughly that you crush the chickpeas.) Then tip the bowl discarding the water and the skins. (The skins should float to the top making them easy to discard.) Refill the bowl with water and repeat until most of the chickpeas no longer have any skins on them.
4.Now add your chickpeas to the saucepan with aquafaba and bring to a boil. Then lower to medium heat and cook for an hour. Check every 20 minutes or so to see if they need any extra water; the chickpeas should always be covered with liquid.
5.While waiting you can stir the tahini. If tahini sits for awhile the oil and the paste will separate. So give it a good stir with a butter knife before use. Tip: if one day you see that the tahini is beginning to separate, simply flip the jar upside down and it will naturally mix itself. Then it will be ready to use whenever you need it.
6.Now that the chickpeas are done boiling, strain them and run them under cold water in order to cool them down. (We don't want hot hummus.) Repeat the process of rubbing them in your hands once or twice more to get rid of any leftover, stubborn little skins. Make sure to be gentle this time as the chickpeas will be quite soft now.
7.Now add everything to a food processor. Start with 1 teaspoon of cumin and a half a lemon, then add more according to your preferences. I normally use 2 teaspoon of cumin and 1 whole lemon though.
8.Blend! If it is still very thick, add water, lemon juice (or olive oil is an option too) 1 tablespoon at a time.
9.Serve with pita and veggie sticks, add on top of a salad or inside a sandwich.
There you go, your very own Mediterranean hummus!

My People-Pleasing Self

12.8.19

It is August 12th, 2019, the day before my 3rd season with the Estonian National Ballet begins!
Ugh, the day before any season starts it feels like Christmas Eve. I am so excited! I cannot wait! I don’t want this feeling to go away. I feel like I could run, or fly- take on anything! I feel fearless.

Fear has always been a thorn in my side. I’m always terrified of letting people down or of someone having a negative opinion of me. To be honest I give people’s opinions far too much authority in my life. I don’t want to fear anyone or anything other than God. This verse has proven true in my life time and time again.

“Fear of man will prove to be a snare,
but whoever trusts in the Lord is kept safe.”
Proverbs 29:25

Whenever I put my boss, my colleagues, or my friend’s opinion on a pedestal it quickly becomes a trap. Their opinions, as good, well-intended, or helpful as they might be, will always be a bit flawed. Believing that their words and thoughts about me define my worth and the course of my life is a heavy burden. It always initiates an endless effort of trying to get their approval. It’s exhausting. In ballet especially, it is extremely hard to fight this way of thinking. I literally dance in front of ballet masters for hours every day with the goal of getting their approval. I spend the whole day getting corrected and critiqued and waiting to hear, “good”. A good day for any dancer is when the ballet master is happy and a bad day is when they are not. It’s crazy how it will affect my mood for the whole day or even week at times! It’s hard to detach myself from it and not let it affect the rest of my life.

But the cool thing with God is that I begin from a place of total, unconditional acceptance, not based on my works or accomplishments (and thank God, because it’s hard enough living up to human standards, imagine God’s), and because of that complete acceptance, I have the freedom to fail because my trust is in Him. This doesn’t mean that I intentionally try to fail, or abuse my freedom, but rather that when I do (because I will), it doesn’t change my standing with Him or the plans he has for me. As long as I am His, I am safe.

In some companies, there are “lifetime contracts” which are supposed to secure your position for your whole career. A relationship with God is kind of like that. I have the safety and security to try my best and fail without fear.

Unlike people, God has made up His mind about who we are. We are His and He loves us. That is why we so need to trust in Him and not in people who change their minds day to day.

His Grace, His wisdom, His sovereignty, those are things I want to trust in and surrender myself to.
But my human bosses, my friends, my peers, I want to love them, respect them, honor them, obey them, but not fear them. They are not my god.

I so want my heart to be free from fear, to be so wrapped up in His love that I don’t even have time to be afraid. But it is a daily decision I have to make. Who do I give authority? Who do I trust with my life? Who’s affection do I rely on?

“There is no fear in love; but perfect love casts out fear…”
1 John 4:18

I’m learning every day what it means to choose His love. There is no fear there. Only peace. And as I rest there I am taken deeper and deeper into freedom.

Classic Vegan Chocolate Chip Cookies – 4 Ways

Coookiesssss! Everyone needs to have a staple chocolate chip cookie recipe. And you know what’s crazy, for years I tried to find one and they always came out too bready, or too flat, or too crispy, or burnt. I became disheartened, to the point where I didn’t want try to make cookies anymore because I was sure I was bound to fail. UNTIL I became vegan! Yes, you heard me correctly, vegan! These cookies finally saved me from my cookie despair, and my deprived tummy. No joke, these vegan chocolate chip cookies are “the one”. And as an added bonus, I get a kick from seeing people’s faces when I tell them that they’re vegan. The stunned looks are priceless. I think most people still think I’m lying. So, I’m putting the recipe out there for everyone to know that I’m telling the truth. And the truth is, this vegan cookie dough is the most soft chewy cookie ever.

But you don’t only have to make chocolate chip cookies with this dough, you can add pretty much anything to it and it will probably be yum.

If you follow me on Instagram you will know that a couple weeks ago I posted on my story that I made White Chocolate Chip Macadamia cookies. Same cookie dough recipe. 🙂

So here I have provided 4 different ideas, but hands down the classic dark chocolate chip version is everyone’s favorite. (Keep in mind white chocolate, Twix and Snickers are not vegan). But now that you have a good cookie dough base, you can be creative!

Have fun!

You will need:
  • 1/3 cup solid coconut oil (75g)
  • 1 cup soft brown sugar (210g)
  • 1 flax egg ( 1 Tablespoon flax meal + 2 Tablespoons water) *
  • 1/4 cup (60ml) almond milk
  • 2 teaspoon vanilla extract or essence
  • 2 cup flour (do not pack it down) (250g)
  • 1/2 teaspoon baking powder
  • 1 teaspoon baking soda
  • 1/4 teaspoon salt
  • 1 cup of your favorite chocolate (100g)

* Do not use regular egg, it won’t work. 😉)

Before you start you need to prep your flax egg by mixing the 1 Tablespoon of flax meal (ground flaxseeds) with 2 Tablespoons of water, let it sit in the fridge 10 minutes. Also preheat the oven to 175’C (350’ F). And last but not least, chop your chocolate into small chunks.

Now for the fun stuff.

Mix together your 1/3 cup (75g) coconut oil with 1 cup (210g) soft brown sugar. Blend until soft and there are no more coconut oil chunks.
Now add your flax egg, 1/4 c (60ml) almond milk, and 2 teaspoon vanilla. Mix.
Next add the 2 cups of unpacked flour (250g), 1/2 teaspoon baking powder, 1 teaspoon baking soda, and 1/4 teaspoon salt.
Stir together until it forms a soft ball. It should be easy to hold. If it’s really sticking to the bowl or your hand it needs a bit more flour. But if you have this nice ball and still have some excess flour just discard it to the trash. but normally 2 cups (250g) should be perfect.
And finally add the chocolate! Stir altogether.
To scoop it out I use an ice cream scooper, but you can use a a heaping tablespoon too. Make sure to leave space between each cookie because they will spread out. Cook for 10 – 12 min. I found that 10 minutes works perfectly for me. Poking one with a toothpick can also be handy. If it comes out clean, you’re ready to go! I personally like to slightly undercook them (a joy of vegan baking) so that when they cool and harden it insures an ultra soft and fudgy cookie. But this definitely depends on preference and the size of your cookie.
Once they come out of the oven I suggest letting them cool on the pan for at least 12 minutes. Before transferring them to a wire rack or plate, where they can cool for another 10 min.

To sum up…

Vegan Chocolate Chip Cookies - 4 Ways
Servings: 12-15 cookies

Ingredients:
1/3 cup solid coconut oil (75g)
1 cup soft brown sugar (210g)
1 flax egg ( 1 Tablespoon flax meal + 2 Tablespoons water) *
1/4 cup (60ml) almond milk
2 teaspoon vanilla extract or essence
2 cup flour (do not pack it down) (250g)
1/2 teaspoon baking powder
1 teaspoon baking soda
1/4 teaspoon salt
1 cup of your favorite chocolate (100g)

Instructions:
1. Prepare your flax egg by mixing the 1 Tablespoon of flax meal (ground flaxseeds) with 2 Tablespoons of water, let it sit in the fridge 10 minutes.
2. Preheat the oven to 175’C (350’ F).
3. Chop your chocolate into small chunks.
4.in a large bowl mix together your 1/3 cup (75g) coconut oil with 1 cup (210g) soft brown sugar. Blend until soft and there are no more coconut oil chunks.
5.Now add your flax egg, 1/4 c (60ml) almond milk, and 2 teaspoon vanilla. Mix.
6.Next add the 2 cups of unpacked flour (250g), 1/2 teaspoon baking powder, 1 teaspoon baking soda, and 1/4 teaspoon salt.
7.Stir together until a soft ball forms.
Tip: sometimes the flour can vary. Once you’ve mixed the flour into the batter, you should have a ball of dough, this should be fairly easy to hold. If it’s sticking to the bowl or your hand it needs a bit more flour. But if you already have this nice ball and still have some flour left just discard the excess flour into the trash. However 2 cups (250g) should be perfect.
8. And finally add the chocolate! Stir altogether.
9.To scoop it out I use an ice cream scooper, but you can use a a heaping tablespoon too.
Tip: Make sure to leave space between each cookie because they will spread out. Cook for 10 - 12 min. I found that 10 minutes works perfectly for me. Poking one with a toothpick can also be handy. If it comes out clean, you’re ready to go! I personally like to slightly undercook them so that when they cool and harden it insures an ultra soft and fudgy cookie. But this definitely depends on preference and the size of your cookie.
10. Once they come out of the oven I suggest letting them cool on the pan for at least 12 minutes. Before transferring them to a wire rack or plate, where they can cool for another 10 min.
*DO NOT use regular egg. It will make it flat and crispy.
That’s it! Enjoy!

Unforsaken

6.5.19

The way God loves us is just amazing! His heart for us is beautiful.

We have strayed so far from His original plan for us, and yet that hasn’t deterred His love from us in the slightest. We were created to be loved and to love. To be loved by Him- He has faithfully loved us through the ages, He has not failed. We, on the other hand… we have failed miserably at loving Him and loving our neighbor. But because of His unconditional and loyal love, we are not forsaken unto self destruction. Because of His perfect love we have both reason and ability to live the way He intended. And as we surrender to His love He will lead us back to what we were originally made for.

“Though the Lord is on high, Yet He regards the lowly; But the proud He knows from afar… The Lord will perfect that which concerns me; Your mercy, O Lord, endures forever; Do not forsake the works of Your hands.” Psalm 138:6,8

If you read “Masterpiece” you will know that a couple months prior to this journal entry I was in the middle of an audition period. I was learning to follow the guidance of my Master artisan. I learned that God calls us His masterpiece! How incredible, that out of all creation, we are His pride. Insane. Anyways, there I was, a couple months later, after the auditions, still facing a very “unknown future”, but resting assured that He will “perfect that which concerns me”, and that even though I often fail, He will “not forsake the works of His hands.” Both in the grand scheme of things and in our own life, He will regard the “lowly” or humble, He will perfect the things that concern us, He won’t leave anything undone or wasted, He will always finish what He started, and He won’t abandon us, the work of His hands. Why? Because He loves us.

Mama’s Enchiladas

Ok, guys. This recipe is EVERYTHING! I know many people have been waiting for this post because, well, if you know, you know, and if you don’t know, you should!

I announced on my Instagram page that I was doing an enchilada recipe soon and a friend, whom I haven’t seen in ages, said she remembers my mama’s recipe from over 10 years ago! That’s insane. So to say that it leaves an impression on your tastebuds is an understatement.

My friends now ask me to make mama’s enchiladas for group gatherings ever since the time she was visiting me and cooked for them. And just to top it off, my friends also readily agreed that it was better than our favorite Mexican restaurant here in Tallinn. We actually haven’t been back since, haha.

Fun fact: Mama is the Queen of improvising. This recipe was birthed when they lived in Russia years ago, and certain ingredients were very hard to find. Good things come from hard circumstances people, you just gotta be a bit creative. When life gives you lemons, make enchiladas, am I right?

So here you go! Mama’s famous Enchiladas.

You will need:
  • 1 medium onion
  • 2 teaspoons minced garlic
  • 500g minced beef
  • 1 small red bell pepper diced
  • 2 packets taco seasoning
  • 1/2 cup sour cream (123g)
  • 1 cup shredded cheese (83g)
  • 2 Tablespoons chopped cilantro
  • 2 500g cartons plain tomato sauce
  • 8-10 medium tortillas

First thing; preheat oven to 175’C (350’F)

Heat a couple tablespoons of oil in a pot on medium-high heat. Once hot, add chopped onion and minced garlic. Sauté for about 2 min or until soft.
Next add the meat and cook until it’s a nice brown color and you can’t see any more pink. This will take about 5-7min. Then add your diced bell pepper and 1 packet of taco seasoning. Cook together for another 3 min. Your meat should be totally cooked through.
Before you continue to the next step make sure to drain any excess oil from the pot. Remove the pot from heat and add the sour cream, cheese, and cilantro.
Stir until all combined.
Time to prep the tortillas! In a large shallow dish (I used a pie pan) pour in your tomato sauce and the other packet of taco seasoning. Stir together.
First, add a thin layer of your sauce to a large rectangular baking dish. Then dip both sides of the tortilla in your mixture.
After you have dipped both sides, add a few tablespoons of your meat mixture to the tortilla, just off center. This makes it easier to roll up.
Roll it up, and move it to the side. Make sure the lip of the tortilla is on the bottom so it doesn’t unroll.
Repeat until you don’t have anymore space. (It’s ok to squish them a bit).
Pour excess sauce on top, then sprinkle some shredded cheese as well. Be generous.
Then bake for 20 min, or until cheese is melted and the edges of the tortillas are darkening.
And, but of course, share with friends!
Mama’s Famous Enchiladas

Serves:4-5

Ingredients:
1 medium onion
2 teaspoons minced garlic
500g minced beef
1 small red bell pepper diced
2 packets taco seasoning
1/2 cup sour cream (123g)
1 cup shredded cheese (83g)
2 Tablespoons chopped cilantro
2 500g cartons plain tomato sauce
8-10 medium tortillas

Directions:
1. Preheat oven to 175’C (350’F)
2. Heat a couple tablespoons of oil in a pot on medium-high heat.
3. Once hot add chopped onion and minced garlic. Sauté for about 2 min or until soft.
4. Next add the meat and cook until it’s a nice brown color and you can’t see any more pink. This will take about 5-7min.
5. Then add your diced bell pepper and 1 packet of taco seasoning. Cook together for another 3 min. Your meat should be totally cooked through.
6. Drain any excess oil from the pot.
7. Remove the pot from heat and add the sour cream, cheese, and cilantro. Mix together.
8. Pour your tomato sauce in a large shallow dish, such as a pie pan, and add the other packet of taco seasoning. Stir together.
9. First, add a thin layer of your sauce to a large rectangular baking dish.
10. Then dip both sides of the tortilla in your tomato sauce so that both sides are totally covered.
11. Add a few tablespoon of your meat mixture to the tortilla, just off center. This makes it a bit easier to roll up.
12. Roll it up, and move it to the side. Make sure the lip of the tortilla is on the bottom so it doesn’t unroll. Repeat until the dish is full. It’s ok to squish them a bit.
13. Pour excess tomatoes sauce on top, this prevent to tortillas from drying out or burning. Then sprinkle on some shredded cheese.
14. Then bake for 20 min, or until cheese is melted and the edges of the tortillas are darkening.

Masterpiece

02/02/2019 (This was written in a time when I had a desire to change companies. I thought I needed a bit of a fresh start. I am glad to say that I am no longer looking for a new job, but I’m very happy with where I am at.)

Auditions, auditions, auditions…. I think one of the most nerve wracking processes for any artist is that of auditioning. Spring of 2019 has been a spring of juggling these crazy and potentially life altering appointments.

One day I received an audition invite to Munich. But to my embarrassment, after finalizing all the details with the coordinator, I realized I had misread the dates! It’s always a bit disheartening to have to write a company that you want to get into saying, “thank you for accepting my audition request, but I misread the dates, and they don’t work for me, I really do care though, and oh, do you mind changing your whole schedule so I can make it still”… ugh. Not exactly the kind of first impression I like to give, especially for an organized, people pleaser like myself. I probably over dramatized it in my head, but still, it made an already stressful situation more aggravating. It’s so easy to get caught up in the pressure of saying the right thing, doing the right thing, at the right time, in the right way, etc, when all I really want is for God to lead me. It is so much more restful when I follow His leading rather than fervently trying to plow my own path.

Someone once said, “the most dangerous place you could be is outside of God’s will.” It’s funny how we want to chart our own course, until we get completely stuck, then we’re like, “God, help!” But the cool thing is He doesn’t abandon us, even though we often give Him every reason to.

We are His greatest masterpieces. Yes, humans. And He is the master.

Many people don’t like the idea of God being a master, but I think that comes from a negative view of “masters” that culture has adopted. But in the ballet world we have what we call “ballet masters” they are the masters of our craft. And working with them can be life altering. They are there to teach us and help us grow into the individuals and artists that we are. They are both there to teach us the ways of ballet, that are in some ways, unchangeable, and also to help us discover our own unique qualities that no one else can or ever will posses.

I think it’s the same with God. There are things that are “fixed” in our life, things that we don’t have control of, so to say, but there is so much also to discover with God as we do life together with Him. Unlike earthly masters, God stands outside of time and space and knows what is good for us in the future and how to use our lives for His eternal purposes. He is the master artisan, who created us, and knows exactly how we work, and function, better than we ever could. But He doesn’t want to just stop there. He also wants to keep creating through us. He wants us to join Him in his work!

But, We are far from perfect, injured and often tainted by the sin of the world and the sin in our own lives. But like any good master, one of His roles is to bring us back to perfect form. He is patient, He will work with us to restore us, to make us who we were made to be, if we are willing to follow Him in His ways.

“Righteousness will go before Him, and shall make His footsteps our pathway.” – Psalm 85:13

And because He goes before me I don’t have to be afraid.

“And the Lord, He is the One who goes before you. He will be with you, He will not leave you nor forsake you; do not fear nor be dismayed.” -Deuteronomy 31:8

So, as I move forward, to who knows where, I can be excited that the One who made me, knows what is good for me, and that as I follow Him, I will discover all I was made to be.

“For we are God’s masterpiece. He has created us anew in Christ Jesus, so we can do the good things he planned for us long ago.” – Ephesians 2:10

South Indian Curry

When I was little and still living in Cyprus we had a group of Indian friends who attended our church. I don’t know if you have had the privilege of having any Indian friends, but if you have, you know that they are some of the sweetest, kindest, and generous people. I have nothing but good memories with these beautiful individuals. And on top of their caring hearts, their cuisine is just out of this world!

One of my dreams is to be able to replicate one of their mouth watering dishes. So I took it upon myself to take a couple of Indian cooking classes.

I was very happy with how the dish turned out. It makes me eager to explore this incredible genre of food even more!

Disclaimers: the only liquid in this recipe is the juice that the chicken will produce. So If you want a more “saucy” curry add in a can of crushed tomatoes. Secondly, this recipe will take a bit of time. Everything will be cooked on low to medium heat. I am slowly learning that patience is the key to extracting incredible flavors.

Alrighty, so, let’s start!

You will need:
  • 3-4 tablespoons oil (neutral flavor)
  • 2 teaspoons cumin seeds
  • 1 medium onion diced
  • 1 tablespoon garlic paste
  • 1 tablespoon minced ginger
  • 1/4 c fenugreek
  • 1/2 teaspoon turmeric
  • 1/2-2 teaspoon Indian chili or sub cayenne (I used 2 tsp Kashmiri chili powder)
  • 1/2 teaspoon salt
  • 2 teaspoon coriander powder
  • 1 can crushed tomatoes (optional-for saucier version)
  • 900 grams boneless chicken thigh
  • 1 teaspoon Garam Masala

Before you start it’s important that you have all your ingredients fully prepared so that you don’t burn your spices (while frantically trying to mince garlic for example). Been there, done that. Learn from my mistakes. 😉

First step: add a thin layer of oil to a large pot. You will want a big pot so later the chicken cooks evenly. heat it up on medium heat.
Once hot, toss in your cumin seeds and stir. You can see if the oil is hot enough by sprinkling in a few seeds to start. If they sizzle you’re ready to go. (If you burn your seeds, and they turn black, you should redo this step.) Stir them for about 1 minute.
Next, add the onion. Stir frequently for 5 minutes.
Now add the Fenugreek. This herb is everything! Stir and cook for another 5 minutes.
Now toss in your minced garlic/ginger paste. Stir for 1 minute.
And now add the rest of your spices! This is about the time my flatmate walks in and says, “what are you cooking? Smells amazing!” Stir for about 2 minute.
Now is the time to stir in the tomatoes if you want to. Cover and bring heat to low. Let sit for 7 minutes. (Don’t lift the lid!)
Make sure your chicken is in bite size pieces.

Once the 7 minutes are up, mix in your chicken until evenly combined with the spices.
Cover and let it cook on medium-low for 10 minutes. Then stir, and repeat but only partially covered.
Last step, toss in your teaspoon of Garam Masala and stir. Let cook for one more minute and you’re done!
Serve with rice and enjoy!
South Indian Curry

Serves: 4-6

Ingredients:
3-4 tablespoons oil (neutral flavor)
2 teaspoons cumin seeds
1 medium onion diced
1 tablespoon garlic paste
1 tablespoon minced ginger
1/4 c fenugreek
1/2 teaspoon turmeric
1/2-2 teaspoon Indian chili or sub cayenne (I used 2 tsp Kashmiri chili powder)
1/2 teaspoon salt
2 teaspoon coriander powder
250g tomato paste (optional-for saucier version)
900 grams boneless chicken thigh
1 teaspoon Garam Masala

Direction
1. Heat oil in large pot on medium heat.
2.Once hot, toss in your cumin seeds and stir. You can see if the oil is hot enough by sprinkling in a few seeds to start. If they sizzle you’re ready to go. (If you burn your seeds, and they turn black, you should redo this step.) Stir them for about 1 minute.
3. Add your onion. Stir often for 5 minutes.
4. Add fenugreek. Cook and stir regularly for 5 minutes.
5. Now toss in your minced garlic/ginger paste. Stir for 1 minute.
6. Add the rest of your spices. Cook for 2 minutes. Stir so not to let them burn.
7. Now is the time to add the crushed tomatoes if you want to. Cover and bring heat to low. Let it cook for7 minutes
8. Add chicken and stir for 1 minute.
9.Cover and let it cook on medium-low for 10 minutes. Then stir, and repeat but only partially covered.
10. Last step, toss in your teaspoon of Garam Masala and stir. Let cook for one more minute and you’re done!

She Will Not Fall

December 31st, 2018

Side note: This journal entry is from New Years Eve 2018, but funny enough I sat down to re-write it for the blog on March 30, 2021, the eve of my birthday. As I prepare to finish another year, another chapter in my life, it was so encouraging to read these words once again.

It’s New Years Eve! One of my favorite things to do on New Years Eve is to look back. Often times, we put “looking back” in a negative light. With phrases like, “move forward and never look back”, we often dismiss the very valuable principle of learning from the past. Like Rafiki said, “The past can hurt. But the way I see it, you can either run from it or learn from it.” I think not only are we bound to repeat our mistakes, if we don’t look back, but also we rob ourselves of the joy of seeing just how far we’ve come. We miss out on seeing God’s faithfulness in our lives. The beauty of faithfulness is it’s resilient commitment in every season, EVERY season. I think the beauty of God’s faithfulness is often best displayed when in contrast to the unsteadiness of life. As I look back over the years, both the the sweet and salty seasons, I’m always amazed at how much has happened. It somehow leaves me in a state of gratitude and hopefulness.

One of my verses for this New Year is this,

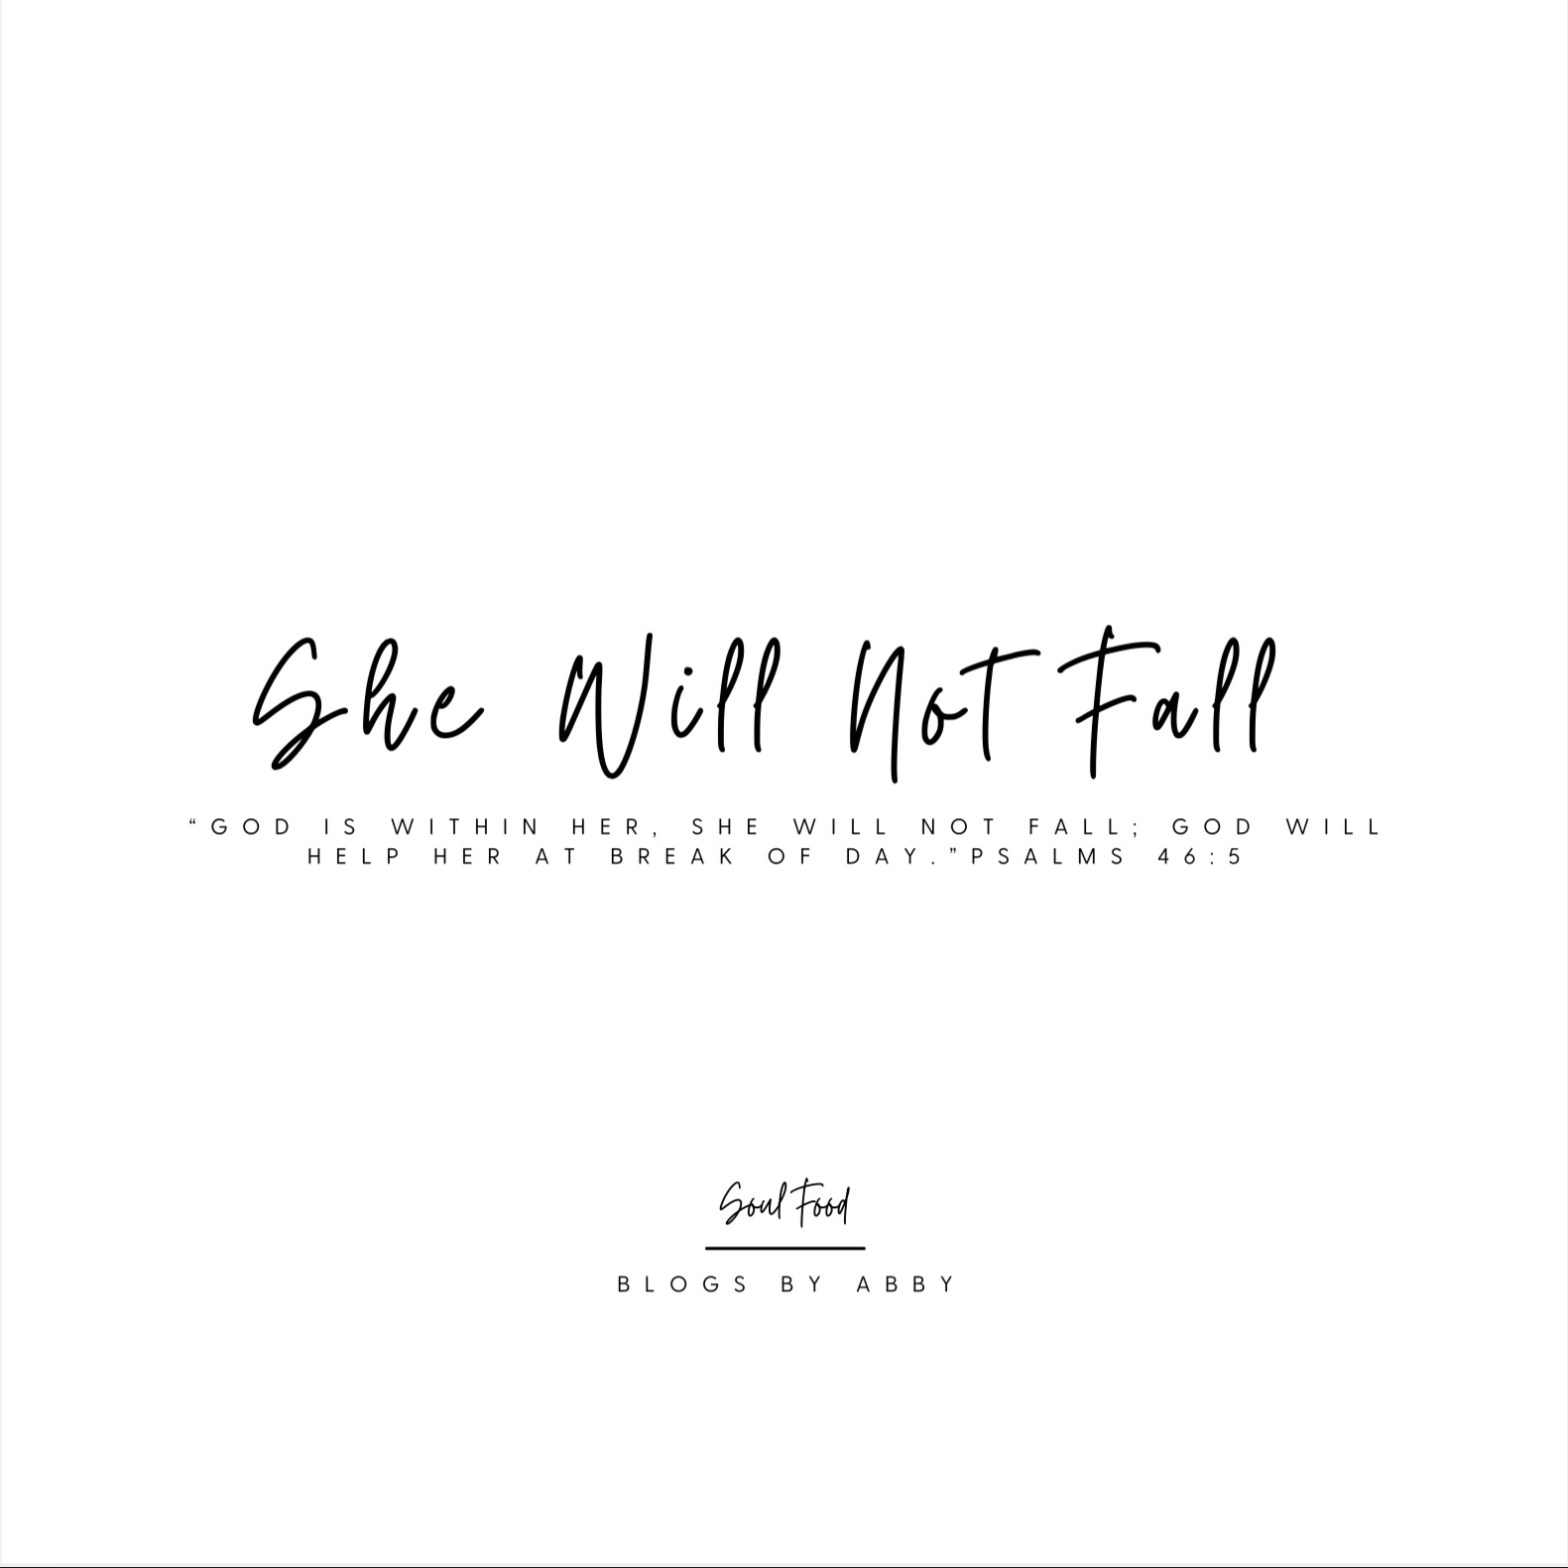
“God is within her, she will not fall; God will help her at break of day.”Psalms 46:5

If you read the verse before you will see that this verse is actually talking about the City of God, Jerusalem, and even more specifically, the temple, God’s dwelling place. In the New Testament it says that now we, our bodies, are the temple of God, (1 Corinthians 6:19) and He will dwell within whomever welcomes Him to. (John 14:23)

See where I’m going with this?

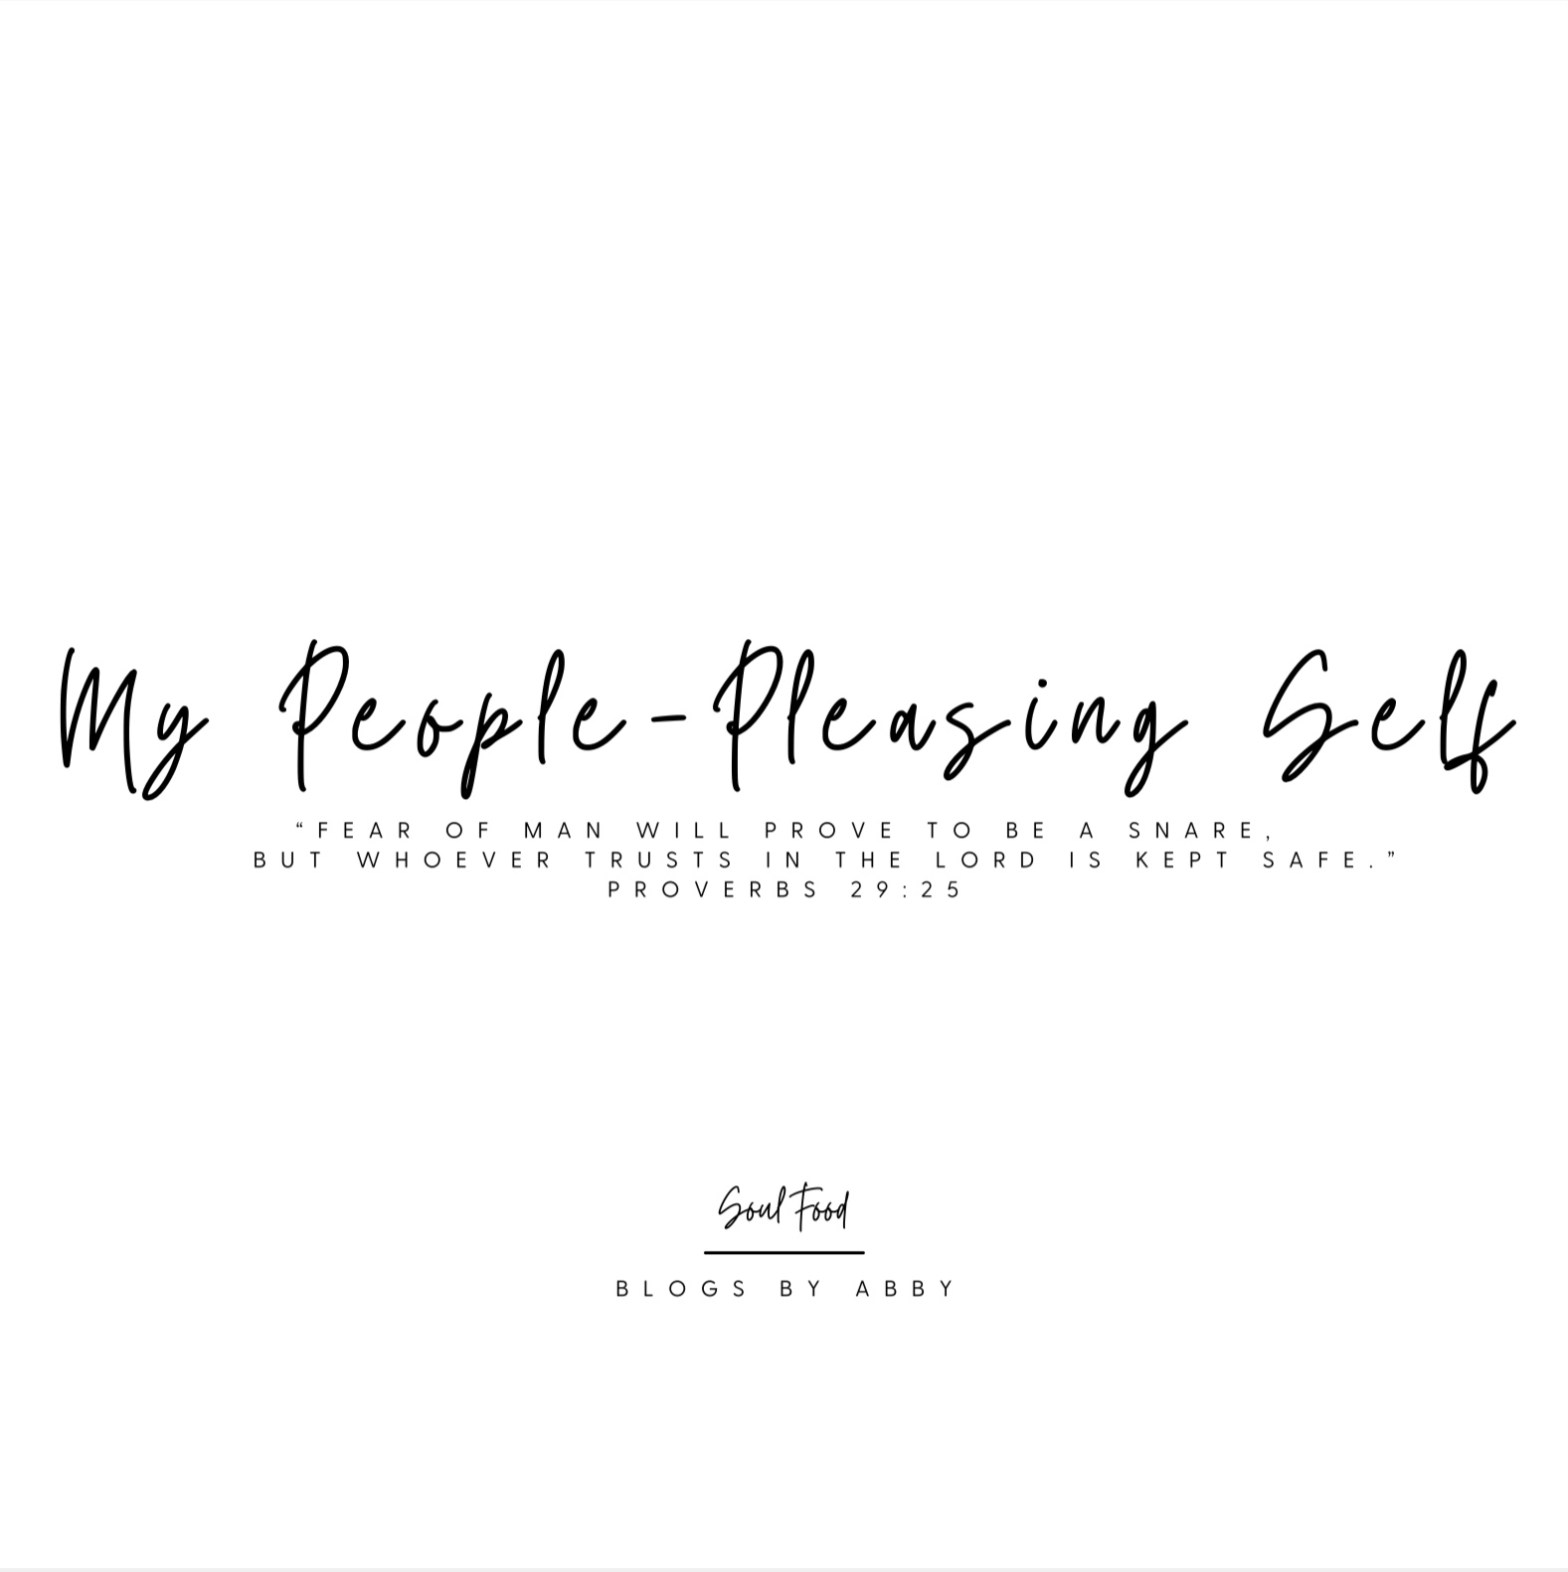
Looking back at the past year I remember all the internal battles I faced. One was pressure. Pressure of pleasing people, pressure at work to always meet people’s expectations. The other one is fear. Fear of failing, fear of people’s opinions, fear of loosing friends. Turns out pressure and fear are a deadly combination. It led to lifeless, joyless, choked dancing, and timid, silent, and empty conversations with people.

But even in that, as I look back, I see the way God sustained me and didn’t let me get completely crushed by the weight of these burdens. I read through my old journals and see God’s gentleness and patience with me. I see the ways He confronted me, drew me out of those mental spaces I was in. I see His grace in not letting me fall. I tripped up, stumbled, and limped plenty, but I did not fall. He healed me and is healing me. He spoke truth and was my helper when I had a hard time telling others about it. He has put incredible people into my life to remind me of who He is and who I am. People who lifted me up and encouraged me every step of the way.

It’s amazing, to see the change in myself, to see the shift in the way I approach things now. But I also know that the battle is far from over. Looking back, I also learned from my tendencies, my habits, my patterns. Those are things that will take time to fully change. It’s kind of a relearning in a way. I believe the devil is the father of lies who, “walks about like a roaring lion, seeking whom he may devour.” (1 Peter 5:8) I recognize my need to be alert and on guard as he readily speaks lies to me when I am unguarded.

I also know that it’s easy to feel pumped on New Year’s Eve, and then completely drained by January 3rd, haha, but I think recognizing that there is a battle, is actually, half of the battle.

And for those of you who know your history, you may say, but Abby, historically, the temple did fall. Does that mean God doesn’t keep His promises?

I’m glad you asked, because I had the same question.

Historically actually the temple was built and destroyed several times. See, the people had a habit of abandoning God, or “kicking Him out” of His own temple so to say. God isn’t going to force Himself on anyone. That isn’t how loving relationships work. He want us to want Him the way He wants us. If you yank your hand from His, kick Him out of your life, or don’t even let Him in in the first place, there is no promise that you won’t eventually be broken by those decisions. However, even if you completely fall, or seem utterly broken, you will find that He is still right there, ready to heal you, ready to take your hand in His once more, and ready to be invited in as King of your heart. There is no one who has fallen too hard that He can’t restore, no one too broken that He can’t heal.

I can’t wait to see what He does this year; to next year, once again, look back and see the faithfulness of my God.

Classic Brownies (Vegan)

Brownies are one of those desserts that are just perfect all year round. Winter, spring, summer and autumn. Its a must have staple recipe.

Here in Estonian, we tend to get all four season in one week, sometimes even in one day, especially as Spring tries to approach. It makes seasonal baking a bit complicated… Do I still make gingerbread and pumpkin pie when it’s May but still snowing (yes, we have had snow in May here). Or do I move on to fruity Spring flavors in March because it’s sunny outside, but still -6 degrees Celsius. Then there are a few random days in the week, like yesterday that it’s +10! That’s basically summer for us, haha. But before we could get too excited, the forecast announced snow later in the week. See what I mean? It’s a struggle.

So now you can understand why it’s so important to have a brownie recipe. It simple, it’s tasty and it’s perfect for every season.

With that being said, let’s begin!

Gather together :
  • 2/3 cup (105g) flour
  • 1/3 cup (25g)cacao powder
  • 3/4 cup (165g) white sugar
  • 1/2 tsp baking powder
  • 1/4 tsp salt
  • 2 flax eggs (or regular) – 2 Tablespoons ground flax seeds + 5 Tablespoons water
  • 1/3 cup (63g) neutral oil of choice (not olive oil)
  • 1 1/2 tablespoons almond milk or other milk
  • 1 tsp vanilla
  • 2/3 cup (80g) Dark Chocolate chunks

Preheat oven to 176’C (350’F)

(If you are using regular eggs leave this step out.)
First you will want to prepare your flax eggs. Mix 2 Tablespoons ground flaxseeds + 5 Tablespoons water, set aside.
Chop up your chocolate. Set aside.
Mix together dry ingredients: flour, cacao powder, sugar, baking powder, salt.
Oops I forgot the sugar. How could I forget the sugar!! 🤦🏼‍♀️
That’s better!
Now add your wet ingredients: flax eggs, oil, and vanilla. Mix. Then add your almond milk. The batter should be very thick and not sticking to the sides of the bowl.
Add in your chocolate chunks and combine.
Line a 23x23cm (9×9 in) pan with baking paper (this will make taking it out and clean up a whoooooleee lot easier 😉). Pour in your batter. Use your spatula to spread it out evenly.

Bake for 20-30minute. For me 25 minutes is perfect! You can poke it with a toothpick to see if it’s done. If it comes out clean, it’s ready! Also the top should be set and not wet.

(Side note: since it’s vegan, that means that if you accidentally, or intentionally, under-bake it, it’s still totally edible! One of my favorite things about vegan baking is eating batter. Doesn’t matter if it’s cake batter, cookie dough, etc, there are no animal products so it’s all safe to eat. 😃)

Let it cool for about 20 minutes before taking it out of the pan. You can serve warm for an extra fudgey, get-chocolate -all-over-your hands-and-face brownie, or let it cool completely for a fudgey, but easier-to-handle brownie. Your choice.
Then, as usual, eat up and share with friends! Enjoy!
Brownies

Servings: 9 square pieces.

Ingredients:

2/3 cup (105g) flour
1/3 cup (25g)cacao powder
3/4 cup (165g) white sugar
1/2 tsp baking powder
1/4 tsp salt
2 flax eggs (or regular) - 2 Tablespoons ground flax seeds + 5 Tablespoons water
1/3 cup (63g) neutral oil of choice (not olive oil)
1 1/2 Tablespoons almond milk or other milk
1 tsp vanilla
2/3 cup (80g) Dark Chocolate chunks

Directions
1. Preheat oven to 175’C (350’F)
2. Prepare flax eggs. (Unless using regular)
3. Chop chocolate.
4. Mix dry ingredients: flour, cacao powder, sugar, baking powder, salt.
4. Add wet: flax eggs, oil, vanilla. Mix. Then add almond milk.
5. Add in chocolate chunks and mix.
6. Line a 23x23cm (9x9cm) pan with baking powder. Pour in mixture and level out with spatula.
7. Bake for 20-30 minutes. Use a toothpick to see if it’s done. If the top of the brownie is set and the toothpick comes out clean, it’s ready!
8. Let cool in pan for about 20 minutes before removing so it can set.
Design a site like this with WordPress.com
Get started